Skip to content
Trio Travel guide

Flight booking settings and permissions

On this page
  1. Add a setting
  2. Edit and search
  3. Confirm deletion

This setting defines a name, an expense ledger and a revenue ledger. Open Settings then Flight Booking Setting. The guide covers adding, editing, searching and deleting settings.
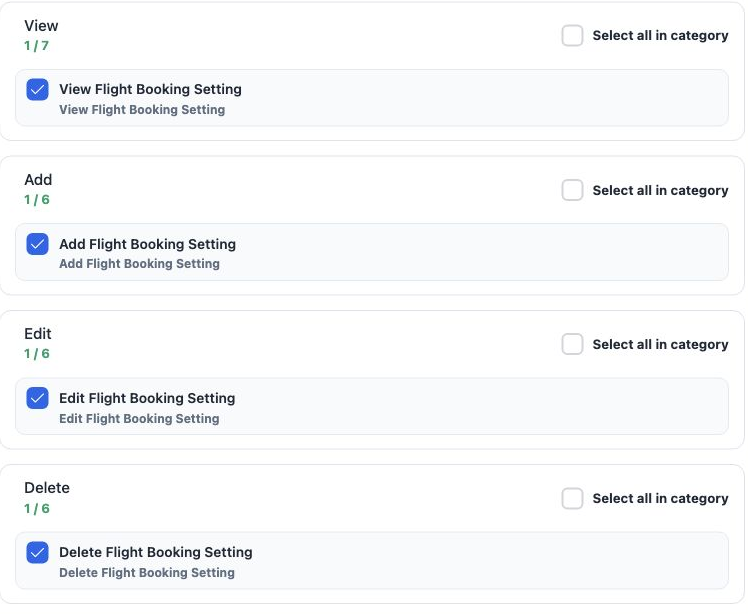
1 In Role Permissions, open Flight and search for flight booking setting. View permits reading, Add creation, Edit changes and Delete deletion...
In Role Permissions, open Flight and search for flight booking setting. View permits reading, Add creation, Edit changes and Delete deletion. Select Save Changes to save permission changes.
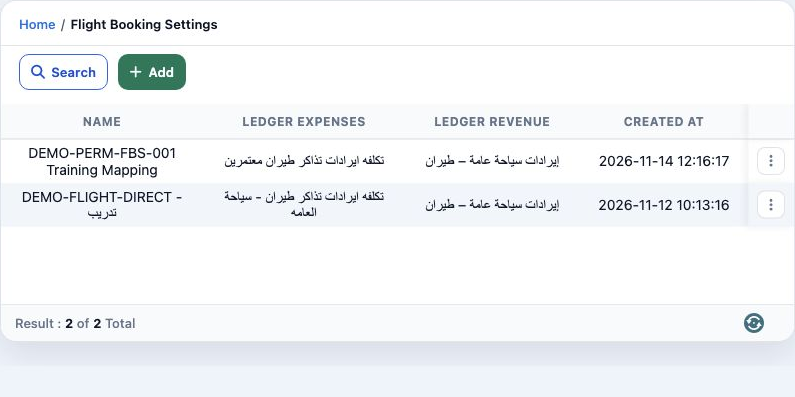
2 The list displays Name, Ledger Expenses, Ledger Revenue and Created At. The example shows the new training setting and the pre-existing sett...
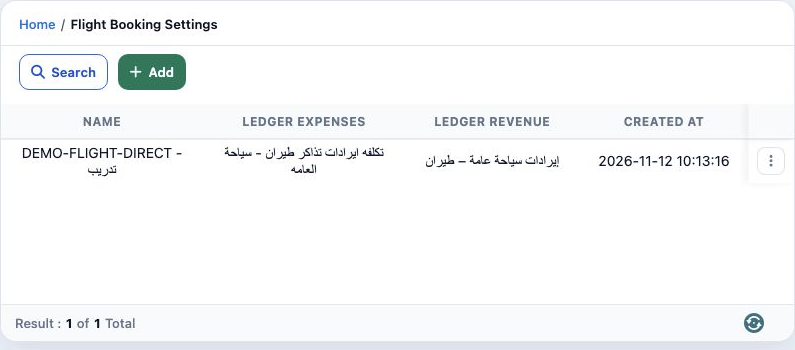
The list displays Name, Ledger Expenses, Ledger Revenue and Created At. The example shows the new training setting and the pre-existing setting as two rows. The row menu offers edit and delete actions according to permissions.

Add a setting

3 Select Add. Enter Name, then choose the expense account under Ledger Expenses and the revenue account under Ledger Revenue. Type part of an...
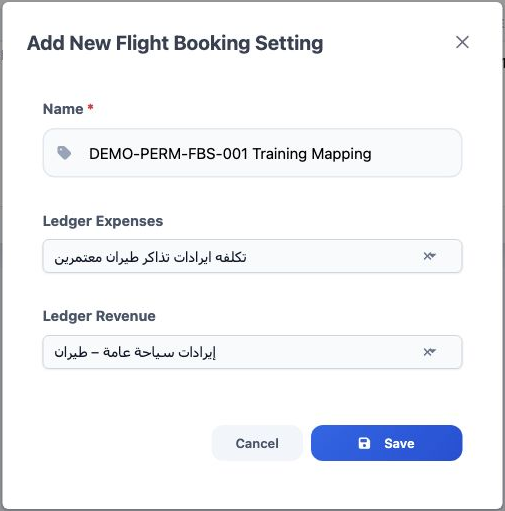
Select Add. Enter Name, then choose the expense account under Ledger Expenses and the revenue account under Ledger Revenue. Type part of an account name in the selector, wait for results and choose the intended account. Select Save. Cancel closes the form without saving.

Prepare ledger accounts in the chart of accounts before selecting them. The example uses accounts already available in the demo environment; the accountant chooses the pair appropriate to the company’s policy.

Saving does not allow a duplicate expense-and-revenue ledger pair already in use, even with a different setting name. If this message appears, review the existing setting and the intended accounts.

Edit and search
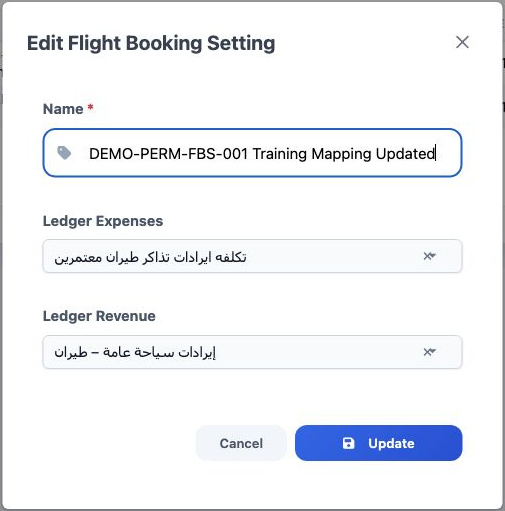
4 Choose Edit from the row menu, wait for the data to load, change Name or the accounts, and select Update. The example saved a name ending in...
Choose Edit from the row menu, wait for the data to load, change Name or the accounts, and select Update. The example saved a name ending in Updated, confirmed after reloading.
5 Select Search, enter Name and use the blue magnifying-glass button to run the search. DEMO-PERM-FBS-001 returned one row. Clear empties the...
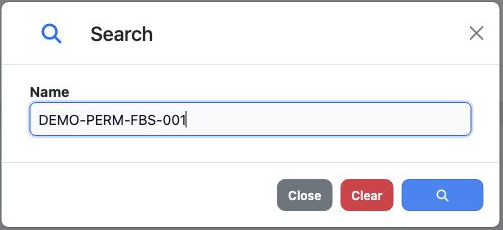
Select Search, enter Name and use the blue magnifying-glass button to run the search. DEMO-PERM-FBS-001 returned one row. Clear empties the field; run the search again to show all settings. Close closes the dialog.

Confirm deletion

6 Choose Delete from the intended row’s menu. Cancel keeps the setting; Yes, delete confirms deletion. The message states that the action cann...
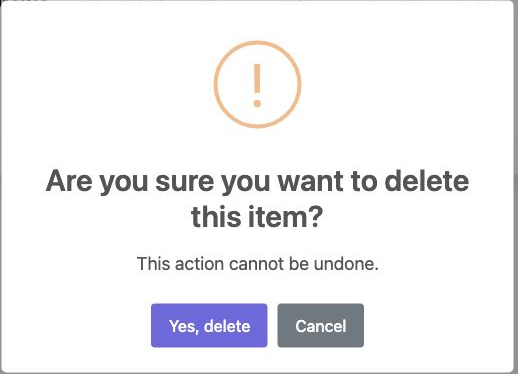
Choose Delete from the intended row’s menu. Cancel keeps the setting; Yes, delete confirms deletion. The message states that the action cannot be undone. The example cancelled first, then deleted only the temporary test setting.
7 After deleting a filtered row, clear Name and run the search again. Only the original setting returned, with its original name, account pair...
After deleting a filtered row, clear Name and run the search again. Only the original setting returned, with its original name, account pair and creation time.

Sign in to record the lessons you have read. Sign in