Electronic invoices
On this page
- Open the electronic invoice list
- Read identifiers and statuses
- Search for an invoice
- Document type and issuer details
- Receiver identity and address
- Add a line and load its item code
- Quantity unit amount and discount
- Line taxes and final amount
- Review lines and save the invoice
- Sign with the signing program and token
- Submit and refresh processing status
- Row tools and bulk actions
Open the electronic invoice list
This guide covers creating an electronic invoice and its lines, signing it, submitting it and monitoring its status. The training example totals EGP 1998 and uses fictitious receiver details.
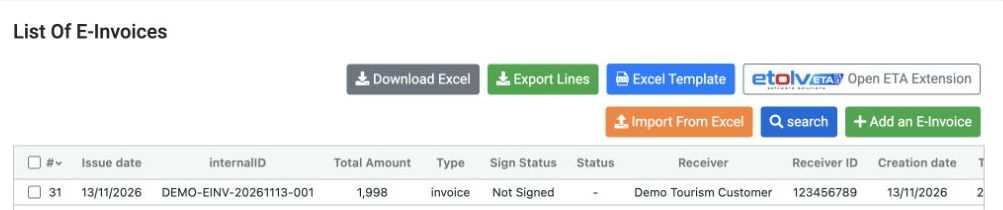
Add an E-Invoice opens a new invoice form, while search opens the filters. Scroll the table horizontally to view the remaining columns.
Download Excel requests a list export, and Export Lines requests an export of invoice lines. Open ETA Extension opens the Etolv ETA extension page in the Chrome Web Store; it is separate from the signing-program window.
Excel Template links to a workbook, and Import From Excel opens file upload. Use the approved template and matching catalog. Column entry and upload are covered in the separate Importing Electronic Invoices from Excel guide.
Read identifiers and statuses

The # column is the record’s list serial; its checkbox selects the row for bulk actions. Issue date is the issue date, internalID is the internal document number, and Total Amount is the final amount.
Type identifies the document, such as invoice, credit note or debit note. Sign Status shows Signed or Not Signed, while Status shows document-processing status. Signing and processing are separate stages.
Receiver is the receiver name and Receiver ID is the identifier appropriate to its type. Creation date is when the record was created in Trio and may differ from Issue date. A dash indicates no displayed value.

Tax T1 and Tax T4 are the amounts of those tax types; Total Tax is their displayed sum. Here they are 252 and 54, totaling 306, but their net effect is 198 because T4 is deducted. Activity code identifies the activity, User Name shows the user, and Items Number counts item lines: one line here, with quantity 2.
Search for an invoice
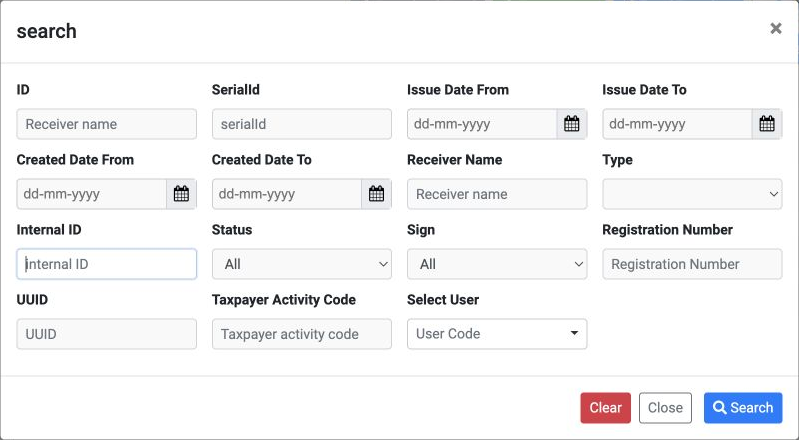
SerialId filters the list serial, and Internal ID the internal document number. ID is a separate field; use Internal ID for the example’s document number.
Issue Date From and Issue Date To filter issue dates; Created Date From and Created Date To filter creation dates. Receiver Name filters the name, Type the document type, and Registration Number the registration number.
Status filters processing status, and Sign filters signing status. UUID is the platform document identifier when available. Taxpayer Activity Code filters the activity and Select User the user. Clear empties the fields, Close closes the dialog and Search runs the query.
Document type and issuer details
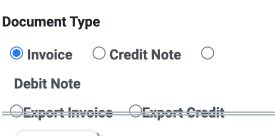
The choices include Invoice, Credit Note, Debit Note and Export types. Choose the type appropriate to the transaction before entering its lines.
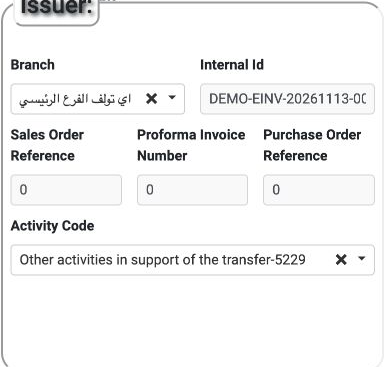
The form header displays the issuer identity, address and branch identifier. Select Branch and enter a unique Internal Id; the full example ID is DEMO-EINV-20261113-001.
Sales Order Reference is the sales-order reference, Proforma Invoice Number the proforma reference, and Purchase Order Reference the purchase-order reference. Activity Code identifies the issuing activity; the example uses 5229.
Receiver identity and address
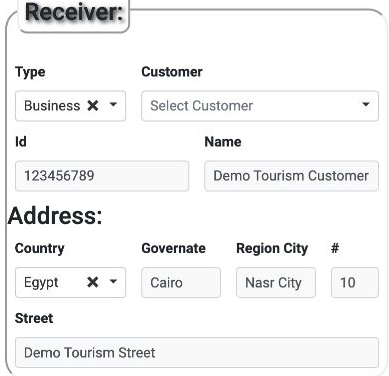
Choose Type for the receiver: Business, Person or Foreigner. Customer allows a registered customer to be selected. Enter the identifier appropriate to the type in Id and the receiver name in Name; do not use the fictitious identity for a real transaction.
Country is the country, Governate the governorate, Region City the city or district, # the building number, and Street the street. The example uses Egypt, Cairo, Nasr City, building 10 and Demo Tourism Street.
Complete fields marked Required before saving, and review the receiver identity and address. Saving the draft does not mean the platform has accepted it.
Add a line and load its item code
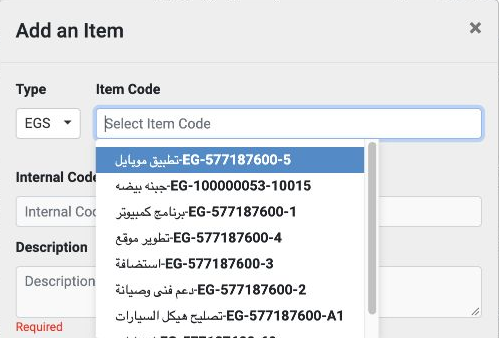
If codes do not appear, press Space inside Item Code, leave the field and open it again. Once the list loads, select the required item.
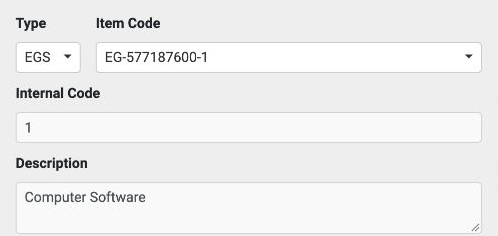
Type selects the coding source and Item Code the standard code. Internal Code is the company’s item code and Description is the line description. Review both before continuing to pricing.
Quantity unit amount and discount
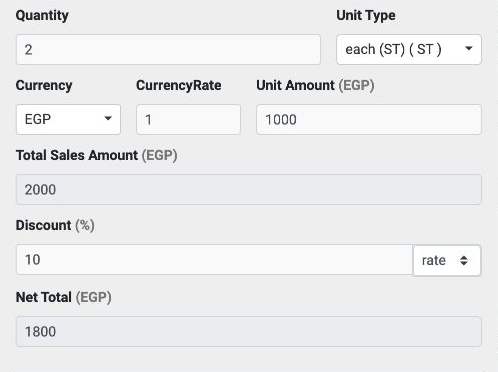
Enter Quantity and select Unit Type. Choose Currency and enter CurrencyRate for conversion to local currency, then enter Unit Amount. The saved invoice line shows quantity 2, unit EA, unit amount 1000 EGP and rate 1.
Total Sales Amount is the quantity value before discount: 2 × 1000 = 2000 here. In Discount, rate selects a percentage and fixed an amount. The form example uses rate at 10%, producing discount 200 and Net Total 1800.
This form differs from the approved Excel import template, where discount is a fixed amount. Refer to the import guide when using a workbook.
Line taxes and final amount
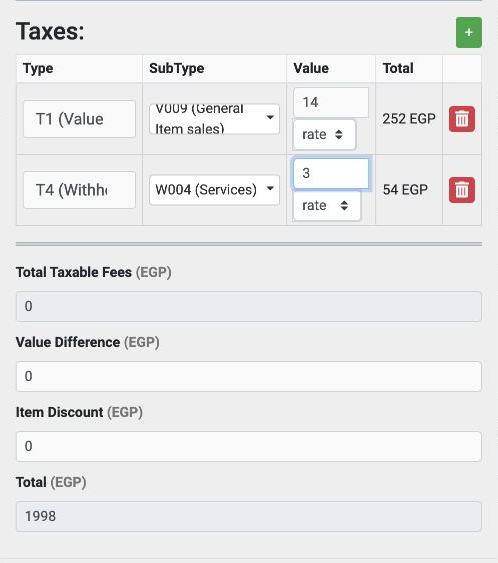
Use the plus button beside Taxes to add a tax. Type is the tax type, SubType its classification, Value its percentage or amount under rate or fixed, and Total the calculated tax amount. A trash icon removes a tax row from the draft.
The saved example uses T1 / V009 General Item sales at 14% and T4 / W004 Services at 3%. These are this training document’s values; the accountant reviews the appropriate rates and classifications for the transaction.
Total Taxable Fees records taxable fees, Value Difference a value difference, and Item Discount a line item discount. These are separate fields and remained zero here; do not substitute them for Discount or Extra Invoice Discount. Add inside the item window places the line into the invoice, while Close closes that window.
Review lines and save the invoice
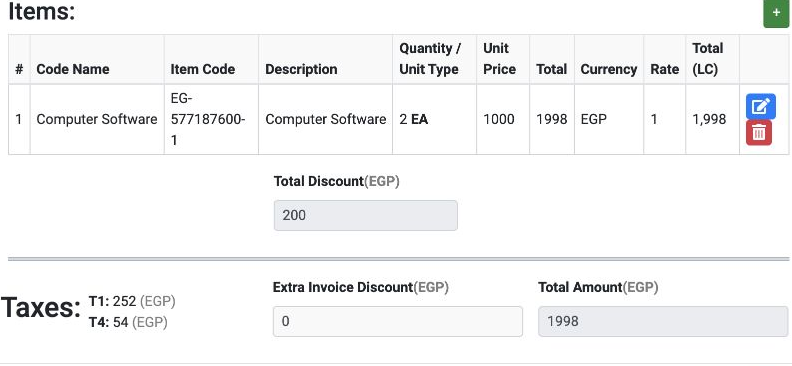
Items columns are # for line order, Code Name for code name, Item Code for the standard code, Description for the description, Quantity / Unit Type for quantity and unit, and Unit Price for unit price.
Total is the final line amount, Currency its currency, Rate the exchange rate, and Total (LC) its local-currency amount. The pencil opens line editing; the trash icon removes it from the draft.
Total Discount is the aggregate line discount, and Extra Invoice Discount is an additional invoice discount. Taxes shows totals by tax type, and Total Amount is the final payable. Here: 1800 + 252 − 54 = 1998.
Select Add in the invoice form to save it, then search by internal ID to review the record. When revising a line later, save the item first and then save the invoice revision with Edit.
Sign with the signing program and token
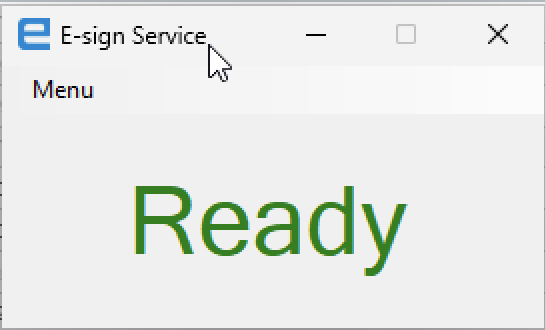
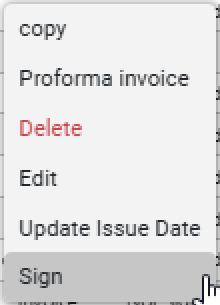
Signed describes signing; it does not mean the invoice was submitted or accepted. The invoice does not need to display the token PIN or integration credentials.
Submit and refresh processing status


The system refreshes status periodically according to the company’s setup. To request an immediate refresh, choose Check status from the row menu or Check Status on the toolbar after selecting the record.
Invalid means the processing result is invalid. Review the details and available response information before further action. Successful submission does not guarantee Valid; this example did not reach Valid.
Row tools and bulk actions

Send List submits selected records, Signature starts signing, Check Status checks status, Update Issue Date updates issue date and Unsign removes the signature. Review the selection before using an action.
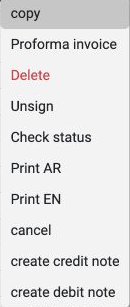
copy is the copy command, Proforma invoice the proforma command, Edit opens editing when available, and Delete is the deletion command. The submitted-record menu includes Print AR and Print EN for printing, cancel, create credit note and create debit note.
A visible menu command does not change the document until selected. Check document status, the intended action and its requirements before proceeding.
Sign in to record the lessons you have read. Sign in