Skip to content
Trio Travel guide

Payment Requests and Approvals

On this page
  1. Set the first approval limit
  2. Set the higher approval limit
  3. Configure company email
  4. Verify the sender address
  5. Create a payment request
  6. Track the pending request
  7. Read the payment request email
  8. Review the higher approver’s queue
  9. Review approval before confirmation
  10. Confirm the request and create the voucher
  11. Open the linked document
  12. Review the payment voucher

Set the first approval limit
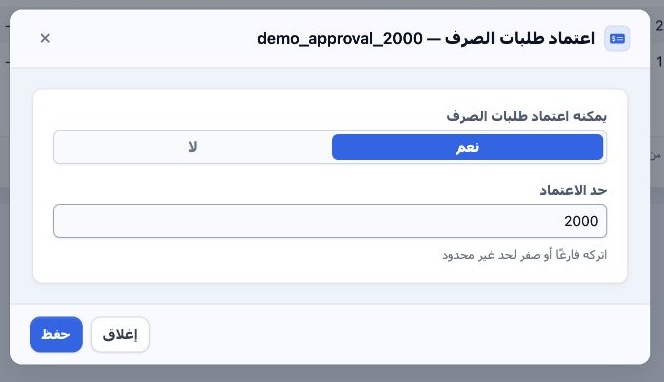
1 In Portal → Users and Permissions → Users, open the user’s row menu and select Approve Payment Requests. Enable approval, set a limit of EGP...
In Portal → Users and Permissions → Users, open the user’s row menu and select Approve Payment Requests. Enable approval, set a limit of EGP 2,000, and select Save.

Set the higher approval limit

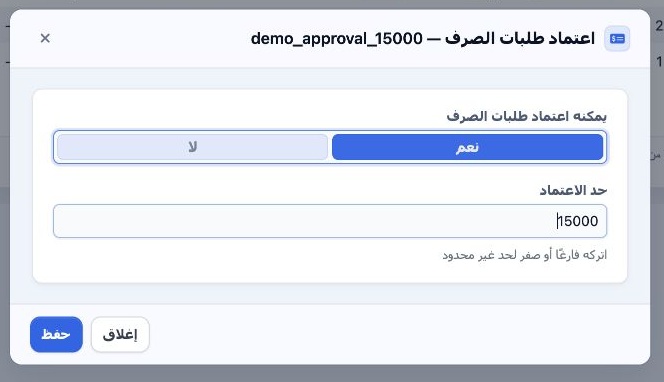
2 Repeat for the second approver. The example limit of EGP 15,000 covers the EGP 10,000 request. Set the approver’s email address on their use...
Repeat for the second approver. The example limit of EGP 15,000 covers the EGP 10,000 request. Set the approver’s email address on their user record for notifications.

Configure company email

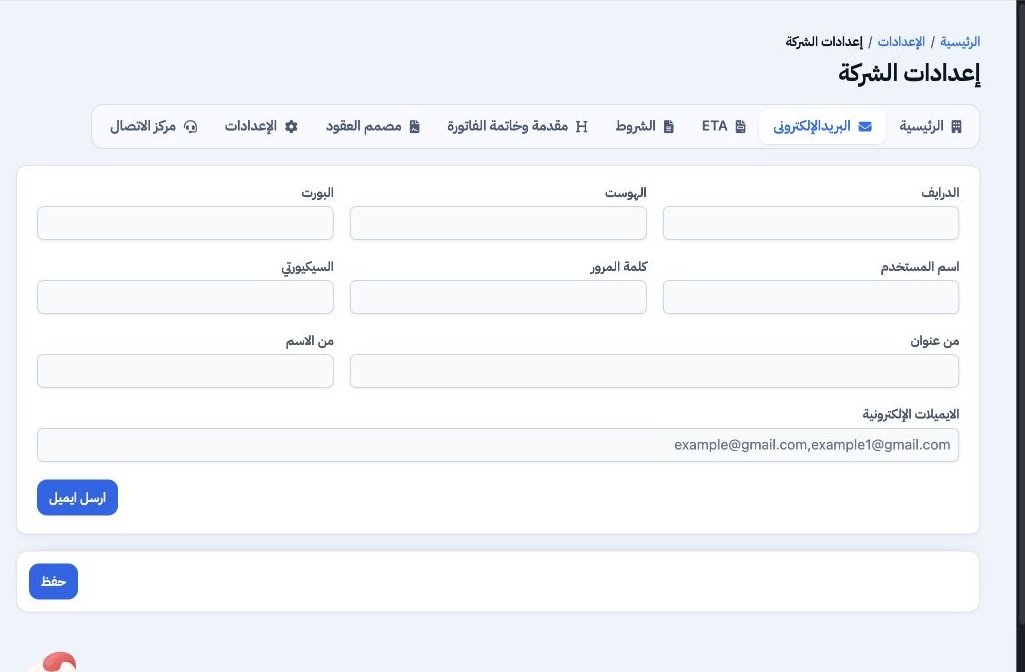
3 From the user menu, open Settings → Company Settings → Email. Enter the approved SMTP settings, set the sender address, and select Send Code...
From the user menu, open Settings → Company Settings → Email. Enter the approved SMTP settings, set the sender address, and select Send Code.

Verify the sender address

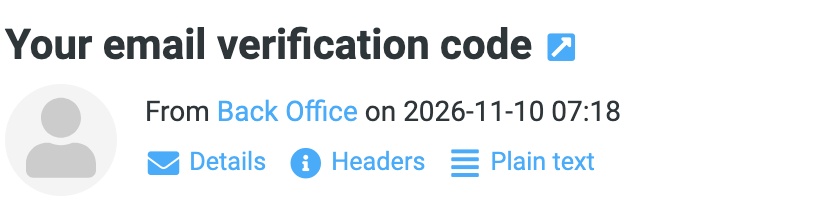
4 Look for the email verification message. Enter its temporary code in the same tab, select Verify, then Save. This message verifies the sende...
Look for the email verification message. Enter its temporary code in the same tab, select Verify, then Save. This message verifies the sender address.

Create a payment request

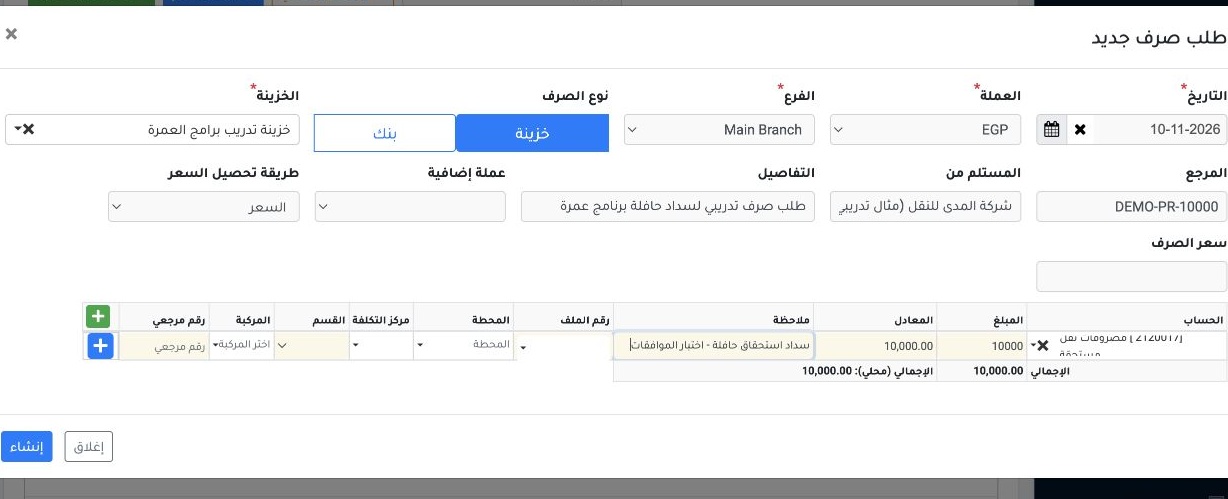
5 In Accounting → Payment Requests, open New Payment Request. Set the branch and currency, and choose Safe. Enter the reference, party and des...
In Accounting → Payment Requests, open New Payment Request. Set the branch and currency, and choose Safe. Enter the reference, party and description. Select the line account, enter EGP 10,000, review the total, and select Create.

Track the pending request

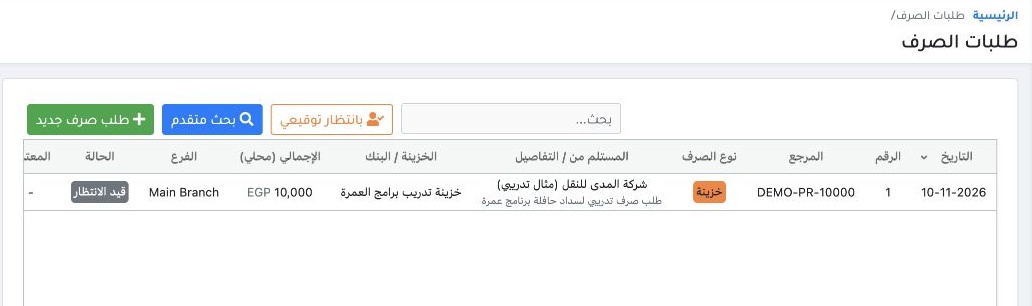
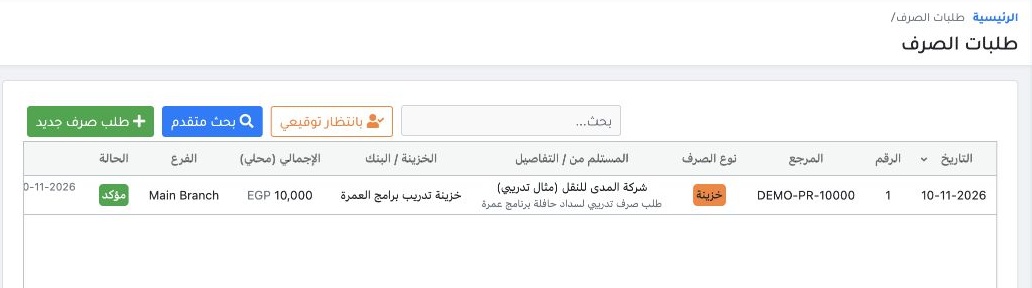
6 Find the request using reference DEMO-PR-10000. Request 1 appeared as Pending. Use Advanced Search to filter by reference, branch or status.
Find the request using reference DEMO-PR-10000. Request 1 appeared as Pending. Use Advanced Search to filter by reference, branch or status.

Read the payment request email

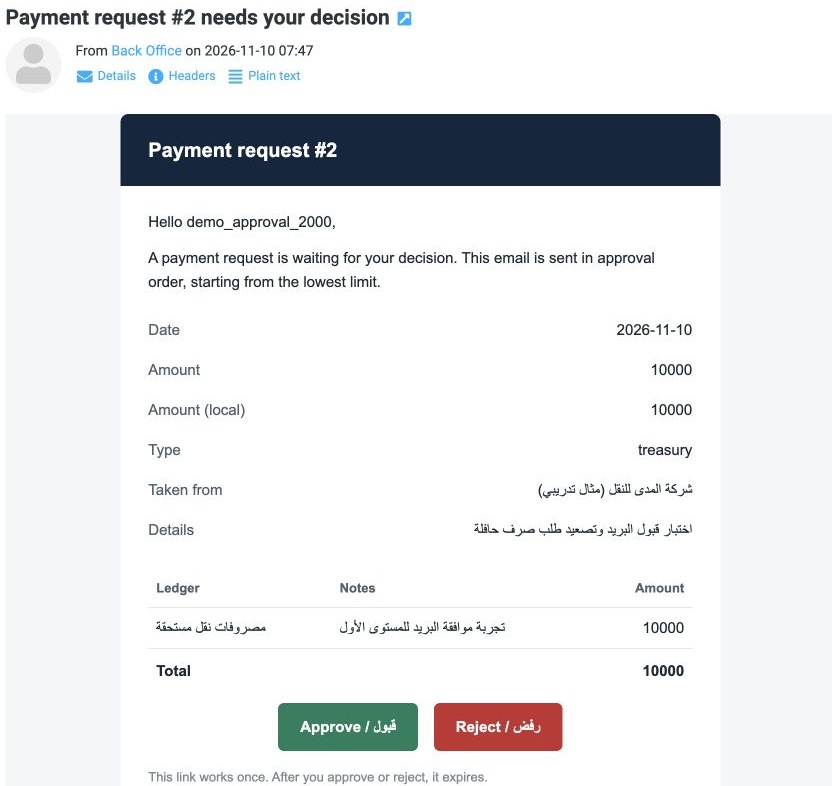
7 The email for training request 2, for EGP 10,000, addressed the approver with the EGP 2,000 limit. It says email is sent in approval order,...
The email for training request 2, for EGP 10,000, addressed the approver with the EGP 2,000 limit. It says email is sent in approval order, starting at the lowest limit. Review the amount and details. The approver selects Approve or Reject to record a decision using a one-time link. The accountant follows up based on the request status. The next screenshots show request 1, which was approved in the application.

Review the higher approver’s queue

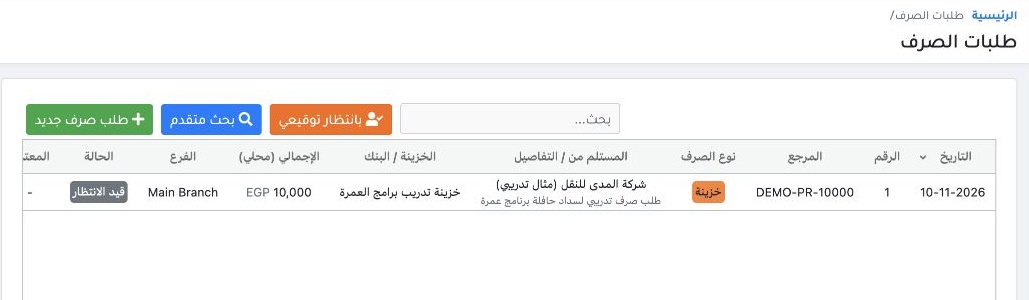
8 From the approver with the EGP 15,000 limit, open Waiting for My Signature. The EGP 10,000 request appeared there. Right-click the row and s...
From the approver with the EGP 15,000 limit, open Waiting for My Signature. The EGP 10,000 request appeared there. Right-click the row and select Approve.

Review approval before confirmation

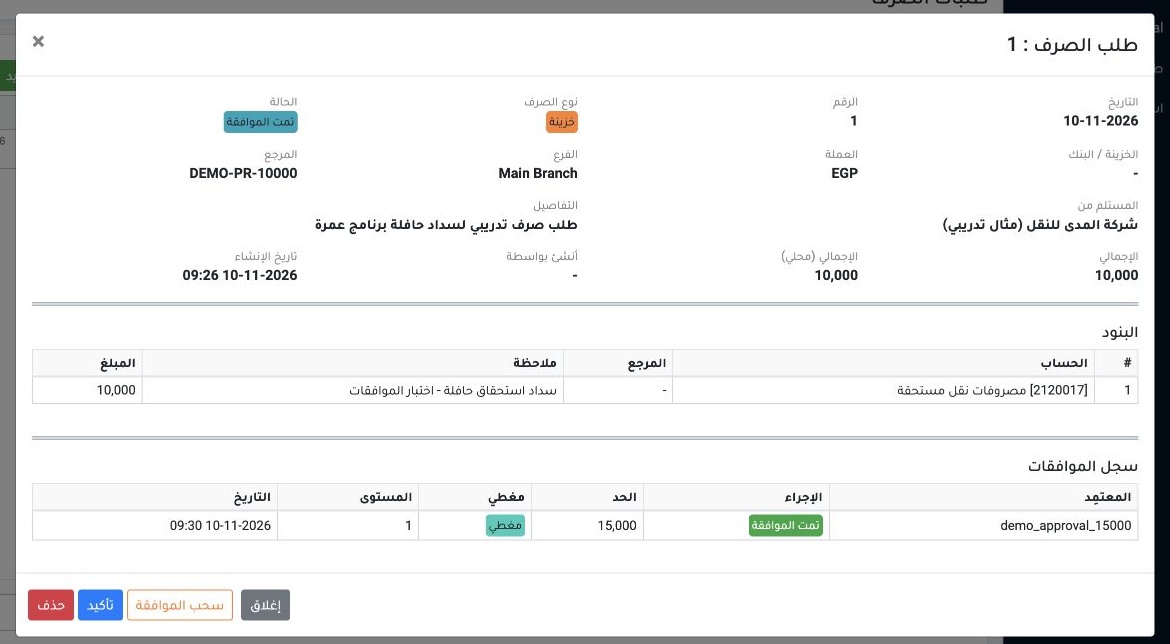
9 Choose View from the row menu. Check the Approved status, approver and limit. In this example, the linked document was still empty at this s...
Choose View from the row menu. Check the Approved status, approver and limit. In this example, the linked document was still empty at this stage.

Confirm the request and create the voucher
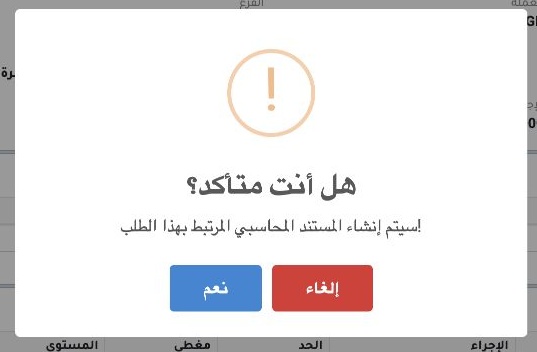
10 In the approved request details, select Confirm. Review the message about creating the linked accounting document, then select Yes. Confirmi...
In the approved request details, select Confirm. Review the message about creating the linked accounting document, then select Yes. Confirming a treasury request creates a cash payment voucher. For a bank request, the system creates a journal entry or a bank payment voucher according to the settings.

Open the linked document

11 After confirmation, the request becomes Confirmed and an Open Document link appears. Follow the link to the cash voucher register.
After confirmation, the request becomes Confirmed and an Open Document link appears. Follow the link to the cash voucher register.

Review the payment voucher

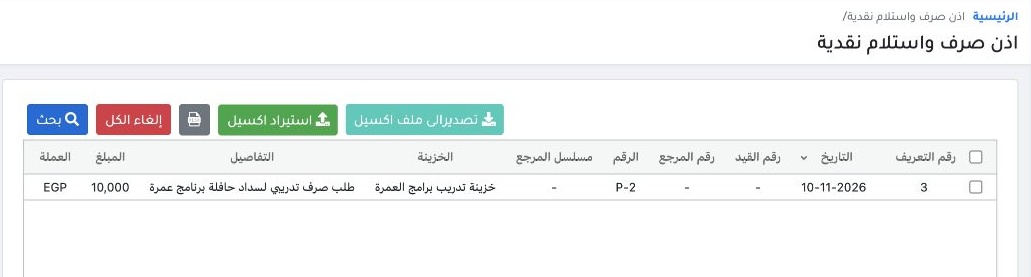
12 Check the voucher number, amount and status. The example produced P-2 for EGP 10,000 as Unconfirmed. If the row does not appear, open Search...
Check the voucher number, amount and status. The example produced P-2 for EGP 10,000 as Unconfirmed. If the row does not appear, open Search, choose Cash Payment and All confirmation statuses, and enter the amount. The accountant reviews the generated voucher and continues posting from the register according to their permissions.

Sign in to record the lessons you have read. Sign in