Skip to content
Trio Travel guide

Payment Voucher

On this page
  1. Enter voucher details and lines
  2. Choose Tag2 and review the voucher
  3. Save the voucher
  4. Find confirmed vouchers
  5. Review and export results

Enter voucher details and lines

1 Open Accounting → Treasury → Cash Payment. Set the date, branch, safe and currency. A safe is first defined as a cash ledger in the Chart of...
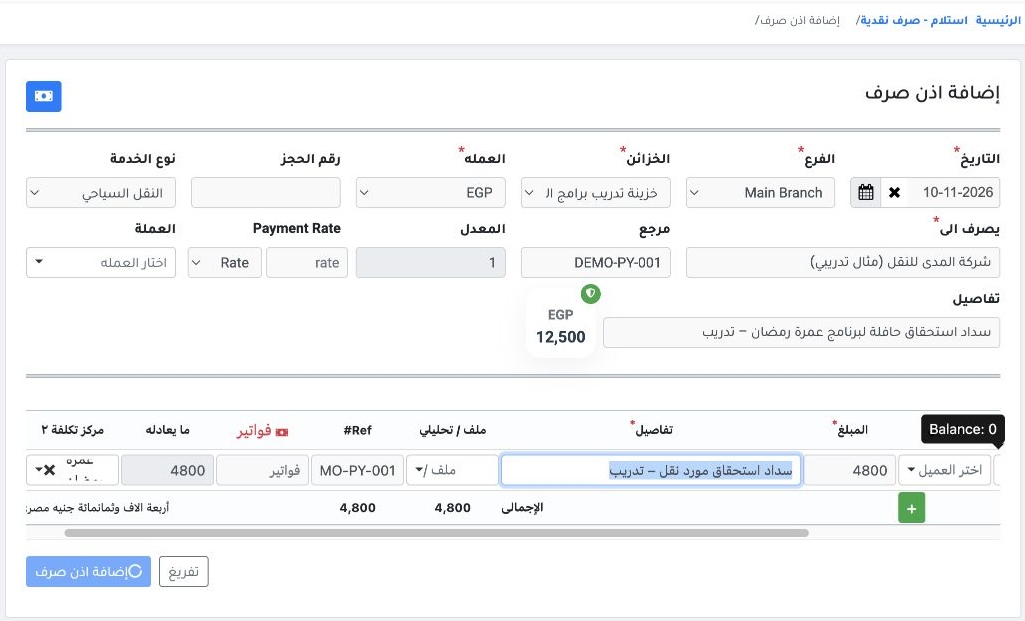
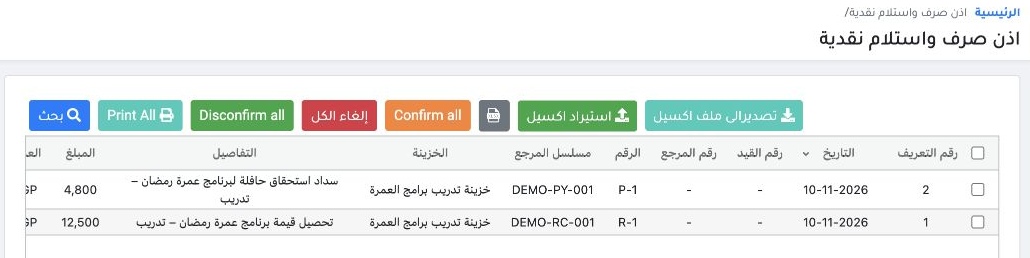
Open Accounting → Treasury → Cash Payment. Set the date, branch, safe and currency. A safe is first defined as a cash ledger in the Chart of Accounts, then linked to its branch, currency and user as applicable under Settings → Safes. Enter the name in Paid To, then enter the reference, service type and description. In the line, choose the ledger and enter the amount and details. Use + to add a line. All lines use the voucher currency. For a USD voucher, every line is in USD. The example shows payment of a bus fare to a transport supplier for EGP 4,800, reference DEMO-PY-001. The example uses ledger 2120017 and the Umrah Programs Training Safe.

Choose Tag2 and review the voucher

2 Open Tag2 on the voucher line and select Ramadan Umrah. For a live transaction, review the details and total before selecting Add Payment Vo...
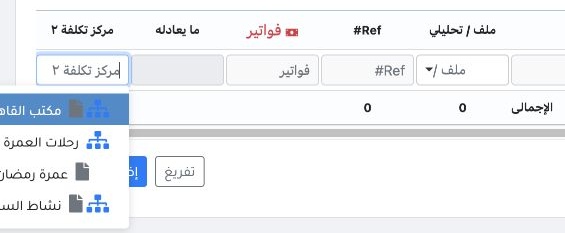
Open Tag2 on the voucher line and select Ramadan Umrah. For a live transaction, review the details and total before selecting Add Payment Voucher. Posting the voucher creates a journal entry. Record safe movements with vouchers. A manual journal entry does not generate a receipt or payment voucher.

Save the voucher

3 Verify the total before saving. The success message appeared, and voucher P-1 appeared as Unconfirmed in the register.
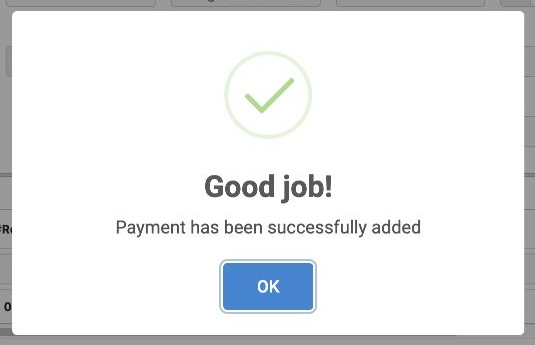
Verify the total before saving. The success message appeared, and voucher P-1 appeared as Unconfirmed in the register.

Find confirmed vouchers

4 Open Cash Receipt and Payment above the form, then select Search. Choose Cash Payment in the voucher type field. Set the date, reference or...
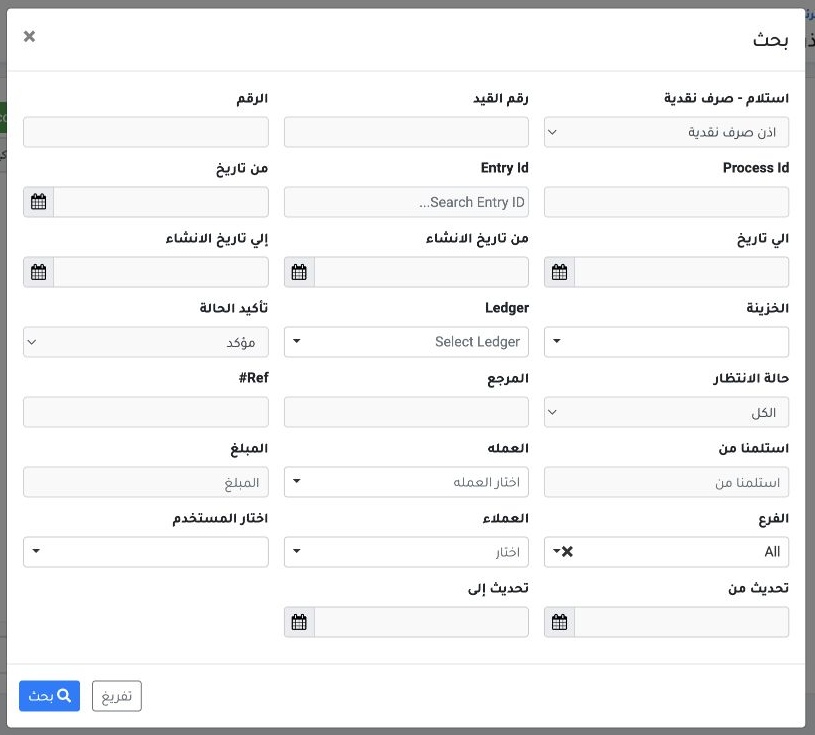
Open Cash Receipt and Payment above the form, then select Search. Choose Cash Payment in the voucher type field. Set the date, reference or branch as needed. The register defaults to Unconfirmed. To find vouchers confirmed on posting, choose Confirmed in Confirmation Status, then select Search.

Review and export results

5 In the shared register, review the voucher type, date, amount and confirmation status. Select Export to Excel to export the results. To corr...
In the shared register, review the voucher type, date, amount and confirmation status. Select Export to Excel to export the results. To correct a voucher, use cancellation as permitted by its status to preserve its serial number. If the safe is wrong, cancel the voucher and create a new one for the correct safe. Each safe has its own number sequence.

Sign in to record the lessons you have read. Sign in