Skip to content
Trio Travel guide

Employee Advances

On this page
  1. 1 Set the employee ledger
  2. 2 General advance mapping
  3. 3 Add an advance
  4. 4 View details and edit
  5. 5 Search and review status
  6. 6 Open posting confirmation
  7. 7 Deletion confirmation

Record an advance and review the employee, amount and posting status.

1 Set the employee ledger
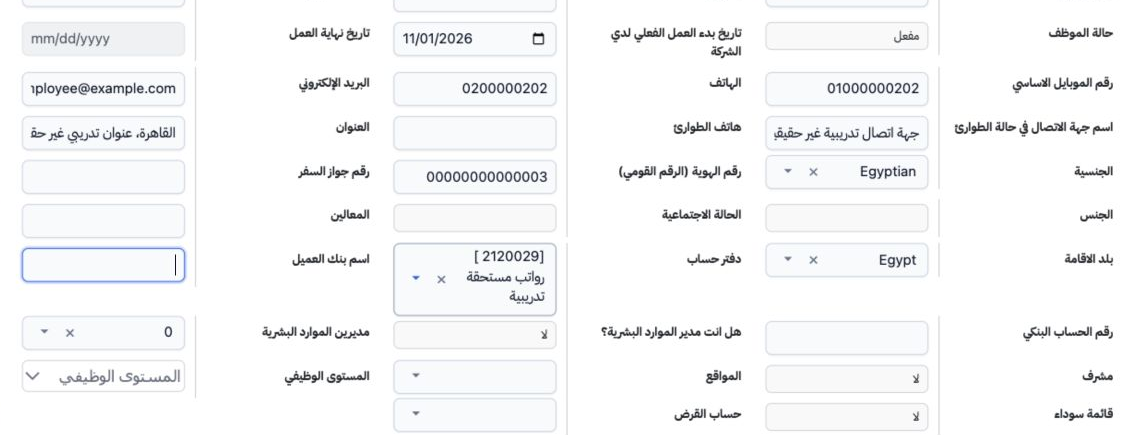
1 Edit the employee and review Ledger (دفتر حساب). Choose an individual employee liability under current liabilities or the shared Salaries Pa...
Edit the employee and review Ledger (دفتر حساب). Choose an individual employee liability under current liabilities or the shared Salaries Payable account, according to company policy. Sarah uses 2120029, رواتب مستحقة تدريبية, in this example. Advances have a separate account.

2 General advance mapping

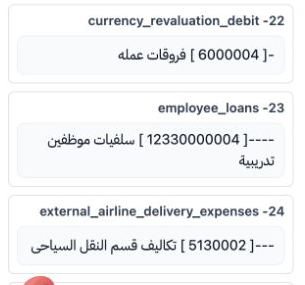
2 Open Settings → Account Settings and review employee_loans under General. Select Edit, choose the approved employee advance account and save...
Open Settings → Account Settings and review employee_loans under General. Select Edit, choose the approved employee advance account and save. The example shows 12330000004, سلفيات موظفين تدريبية, after saving.

3 Add an advance

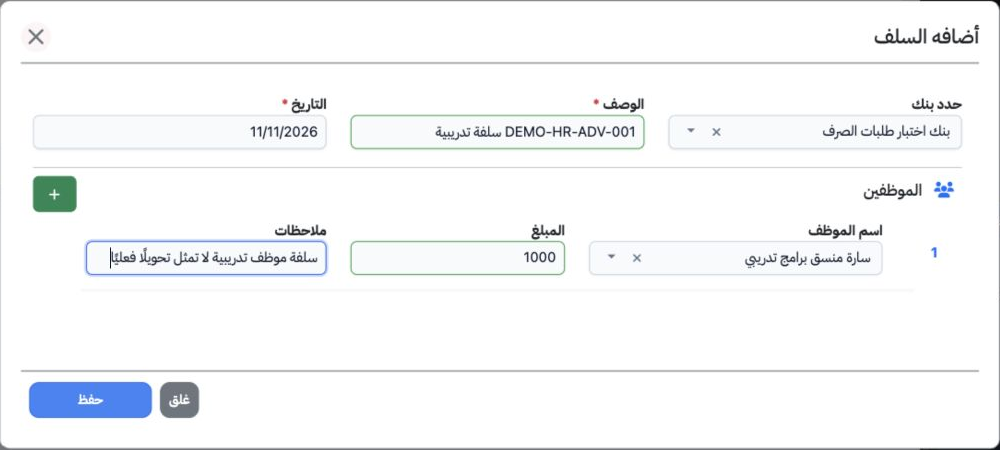
3 Open Human Resources → Operations → Advances, then Add. Choose the bank, enter the description and date. Under Employees, select the employe...
Open Human Resources → Operations → Advances, then Add. Choose the bank, enter the description and date. Under Employees, select the employee and enter the amount and notes. The + control adds another employee row. Select Save. The example uses Sarah, amount 1,000 and بنك اختبار طلبات الصرف.

4 View details and edit

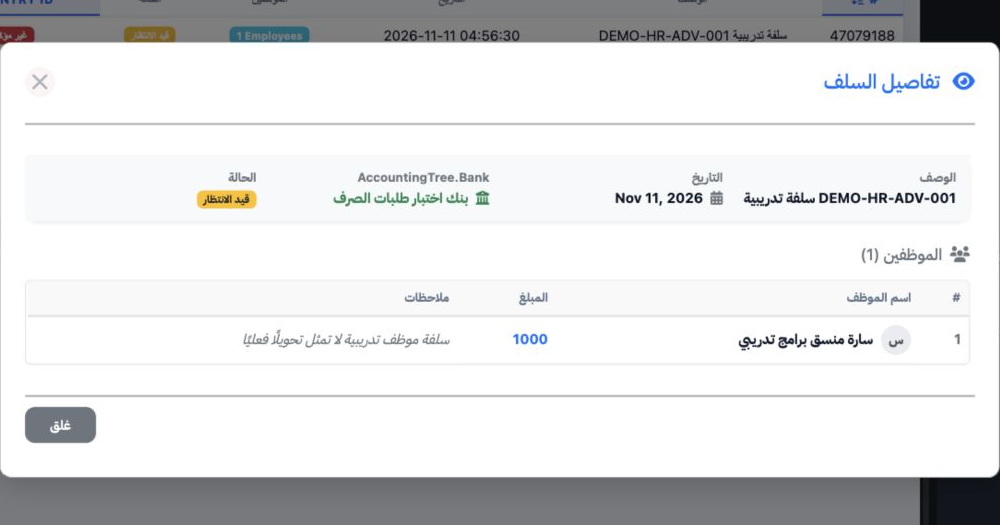
4 Choose View from the row menu to review the description, date, bank, employees and amounts. Close returns to the list. To edit, choose Edit,...
Choose View from the row menu to review the description, date, bank, employees and amounts. Close returns to the list. To edit, choose Edit, update the fields and save. The example description was changed to DEMO-HR-ADV-001 سلفة سياحة تدريبية while the amount stayed at 1,000.

5 Search and review status

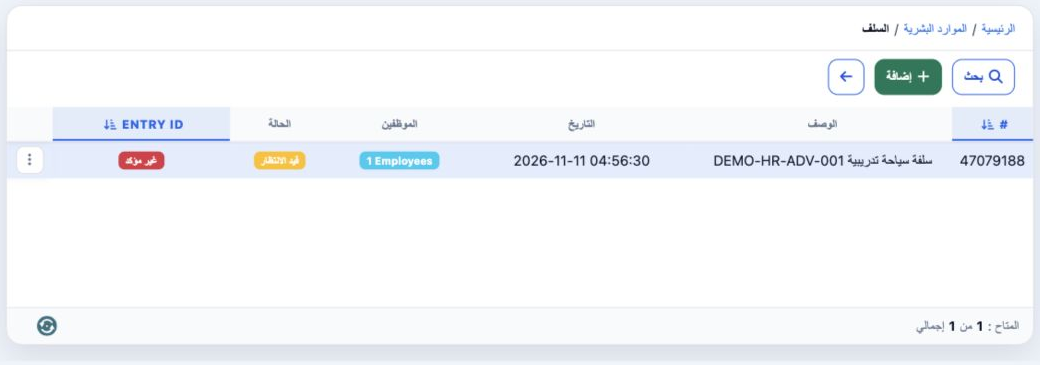
5 Select Search, enter part of the description and set status or dates as needed, then run the search. DEMO-HR-ADV-001 returned one record. Th...
Select Search, enter part of the description and set status or dates as needed, then run the search. DEMO-HR-ADV-001 returned one record. The screenshot shows advance 47079188 as Pending with Entry ID Unconfirmed. Review both the status and entry number when following up posting.

6 Open posting confirmation

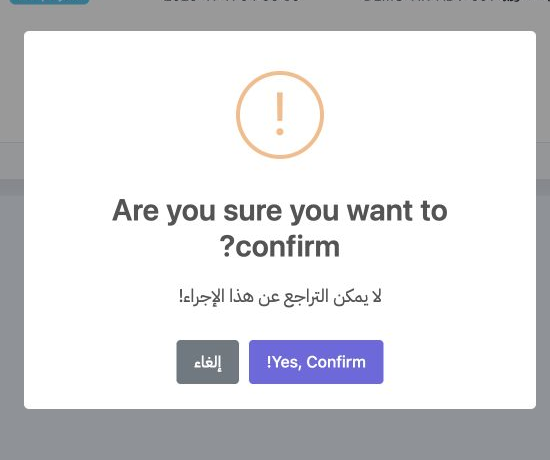
6 From the advance menu, choose the action labelled Post Salary to Accounts (ترحيل الراتب للحسابات). A confirmation dialog opens. Cancel exits...
From the advance menu, choose the action labelled Post Salary to Accounts (ترحيل الراتب للحسابات). A confirmation dialog opens. Cancel exits, while Yes, Confirm! submits the confirmation request. Return to the list and review status and Entry ID afterward.

7 Deletion confirmation

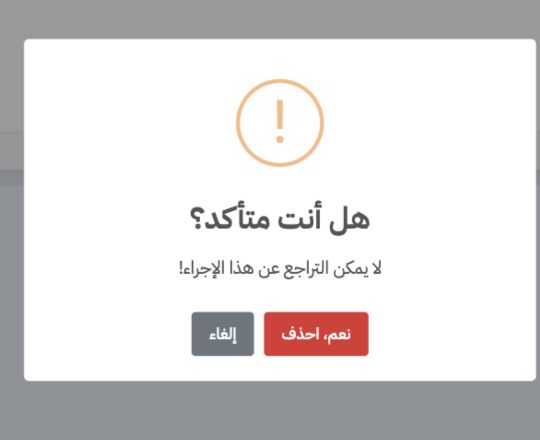
7 Choose Delete from the row menu. Review the intended advance, then Cancel to keep it or Yes, Delete to confirm removal. Deletion was cancell...
Choose Delete from the row menu. Review the intended advance, then Cancel to keep it or Yes, Delete to confirm removal. Deletion was cancelled in this example.

Sign in to record the lessons you have read. Sign in