Skip to content
Trio Travel guide

Importing drivers from Excel

On this page
  1. Opening Drivers and downloading the template
  2. Completing the five fields
  3. Uploading the file and reviewing the result
  4. Reviewing the rejection report and correcting the date
  5. Reviewing the corrected import and final list
  6. Checking driver details and the linked ledger

Opening Drivers and downloading the template

This guide explains how to import drivers from Excel, review successful and rejected rows, and retry only corrected rows. Open Transportation, then Transport Settings, then Drivers.
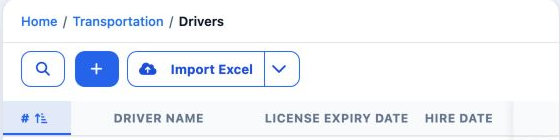

1 The list shows the existing drivers. Use the Import Excel arrow to access the template and catalogue.
The list shows the existing drivers. Use the Import Excel arrow to access the template and catalogue.
2 The blank template has five columns. Keep their headings and order, and enter data from row 2.
The blank template has five columns. Keep their headings and order, and enter data from row 2.

Read the catalogue and the notes attached to header cells. Prepare accurate names and valid birth dates before uploading.

Completing the five fields

name is the driver display name. Fill it in and check that it does not duplicate an existing driver in the company. date_of_birth is optional; use a valid date cell, such as 1990-05-15.

address is optional address text. mobile_no is optional phone text; store it as text to retain a leading zero. license_no is the optional driving licence number.
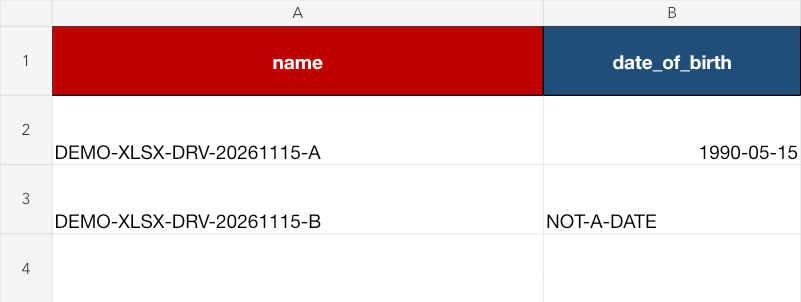
3 The example contains driver A with a valid birth date and driver B with NOT-A-DATE to demonstrate a correction.
The example contains driver A with a valid birth date and driver B with NOT-A-DATE to demonstrate a correction.
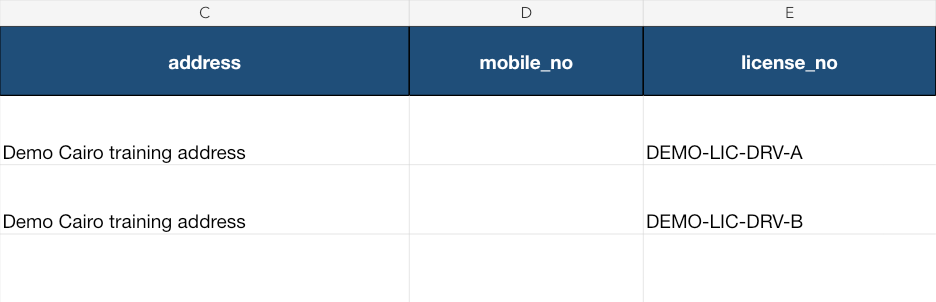
4 The address is a training example, with a distinct licence number for each driver. The phone is blank. Save the file as xlsx.
The address is a training example, with a distinct licence number for each driver. The phone is blank. Save the file as xlsx.

A driver is linked to an accounting ledger during import. Review the Drivers mapping in Account Settings with the accountant before importing new drivers.

Uploading the file and reviewing the result
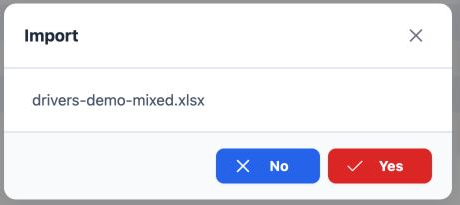
5 Click Import Excel and select the file. Check drivers-demo-mixed.xlsx, then choose Yes to submit or No to return.
Click Import Excel and select the file. Check drivers-demo-mixed.xlsx, then choose Yes to submit or No to return.
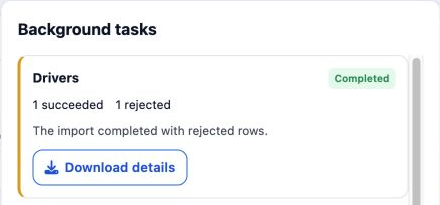
6 Open Background tasks. The Drivers operation shows one successful and one rejected row. Download details provides the rejection report.
Open Background tasks. The Drivers operation shows one successful and one rejected row. Download details provides the rejection report.

Check the driver list after the operation finishes. In this example, A was added as serial 8 and B was absent. Verify that the rejected record is absent before uploading it again.

Reviewing the rejection report and correcting the date
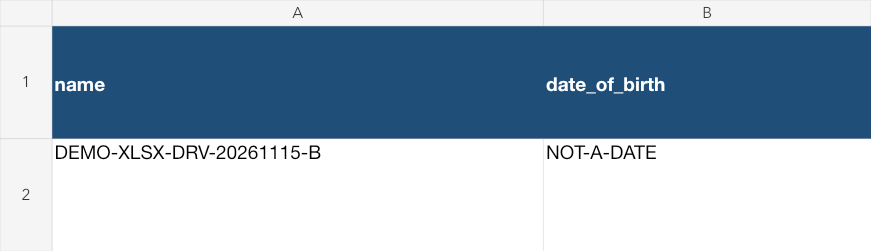
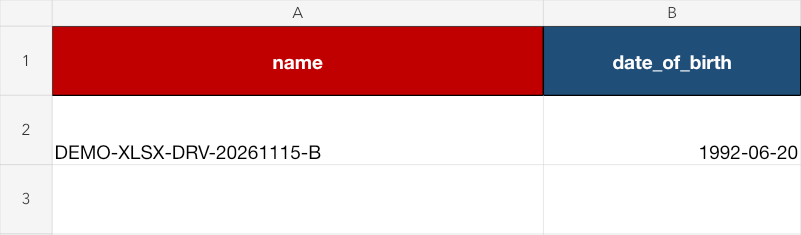
7 This is a view of the downloaded rejection workbook. Its row is B, with NOT-A-DATE as the birth date.
This is a view of the downloaded rejection workbook. Its row is B, with NOT-A-DATE as the birth date.
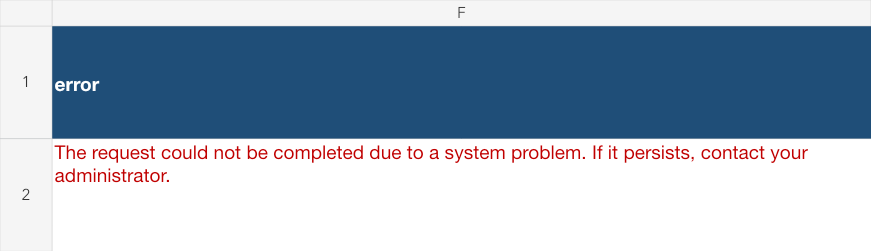
8 The error column shows a general system-problem message and advises contacting the administrator if it persists. Review the row and correct...
The error column shows a general system-problem message and advises contacting the administrator if it persists. Review the row and correct its invalid value.
9 Copy only B into the original template and replace the value with 1992-06-20. Do not include the error column or the successful A row.
Copy only B into the original template and replace the value with 1992-06-20. Do not include the error column or the successful A row.

Save the corrected file, upload it through Import Excel and confirm Yes once.

Reviewing the corrected import and final list
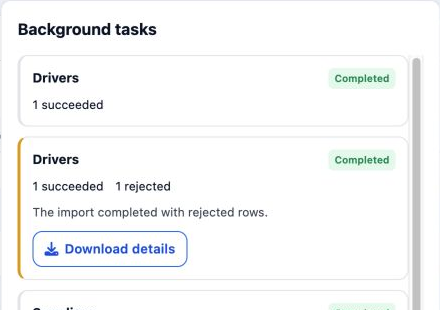
10 The new operation shows 1 succeeded and Completed. The first attempt remains separately listed below it.
The new operation shows 1 succeeded and Completed. The first attempt remains separately listed below it.
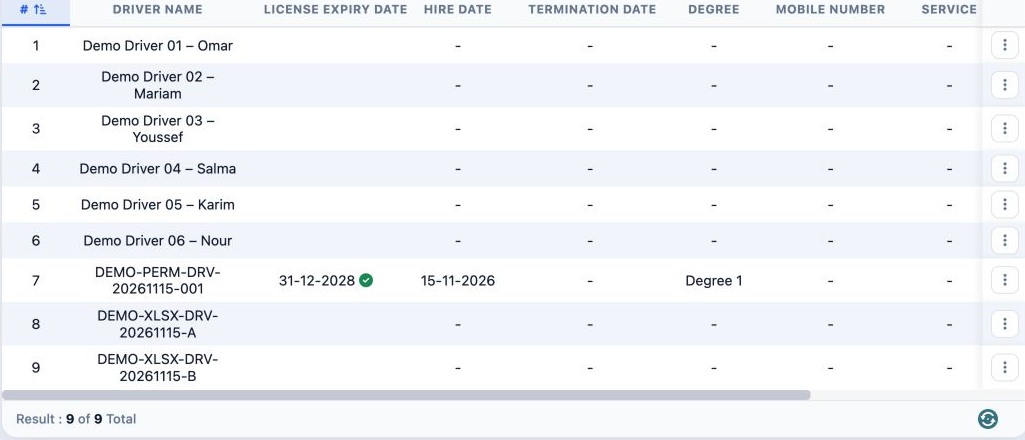
11 The list now has nine drivers. A is serial 8 and B is serial 9, each appearing once.
The list now has nine drivers. A is serial 8 and B is serial 9, each appearing once.

Match each name and its details with your workbook, leaving the existing drivers unchanged.

Checking driver details and the linked ledger
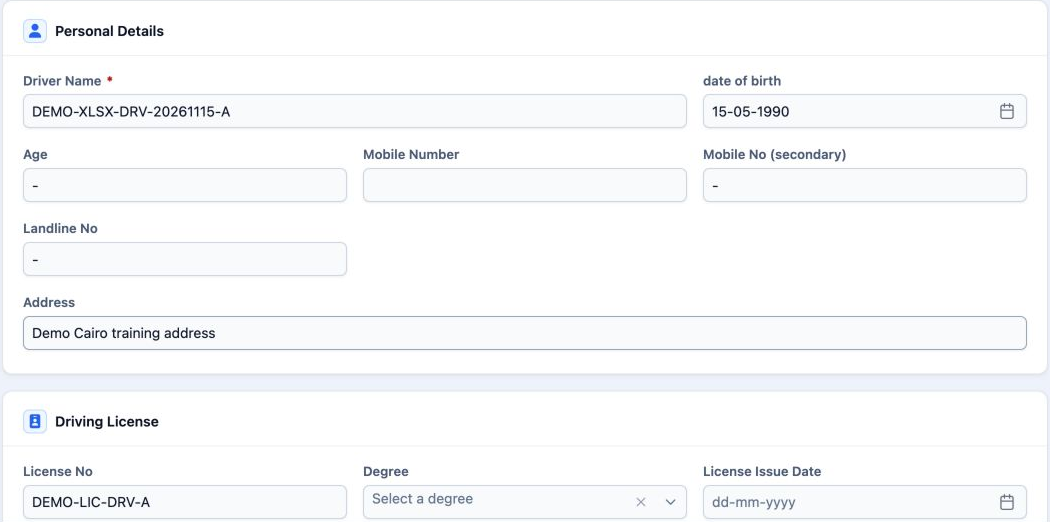
12 Open Edit from A’s row menu to review its details. The birth date is 15-05-1990; the address and licence number match the workbook.
Open Edit from A’s row menu to review its details. The birth date is 15-05-1990; the address and licence number match the workbook.
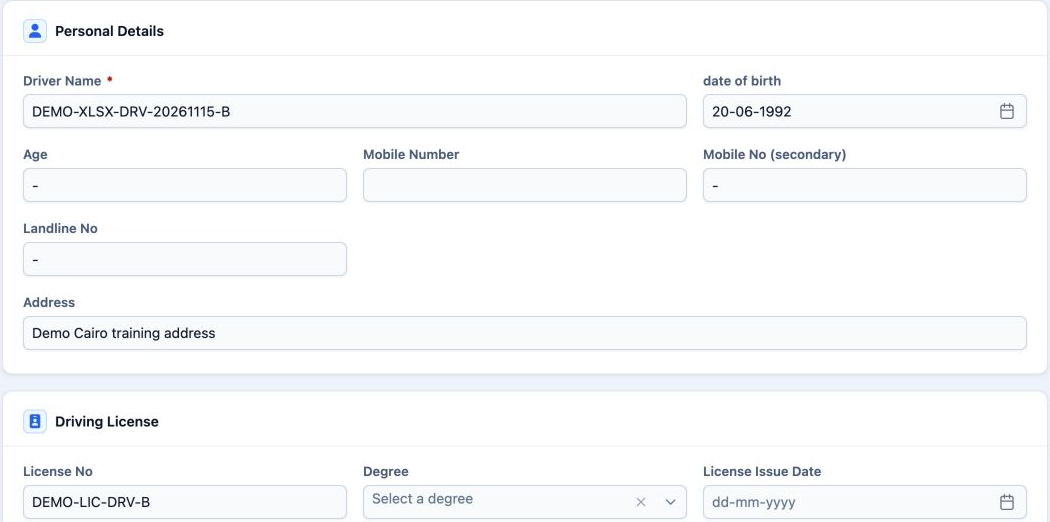
13 B shows the corrected birth date 20-06-1992 and licence DEMO-LIC-DRV-B. Choose Close after reviewing.
B shows the corrected birth date 20-06-1992 and licence DEMO-LIC-DRV-B. Choose Close after reviewing.

A is linked to ledger 21300010008 and B to 21300010009, each named after its driver. Review the linked ledger field in the form with the accountant.

Sign in to record the lessons you have read. Sign in