Skip to content
Trio Travel guide

Inventory Units

On this page
  1. 1 Inventory units
  2. 2 Add a unit
  3. 3 Edit a unit description
  4. 4 Verify the saved change
  5. 5 Review deletion confirmation

1 Inventory units

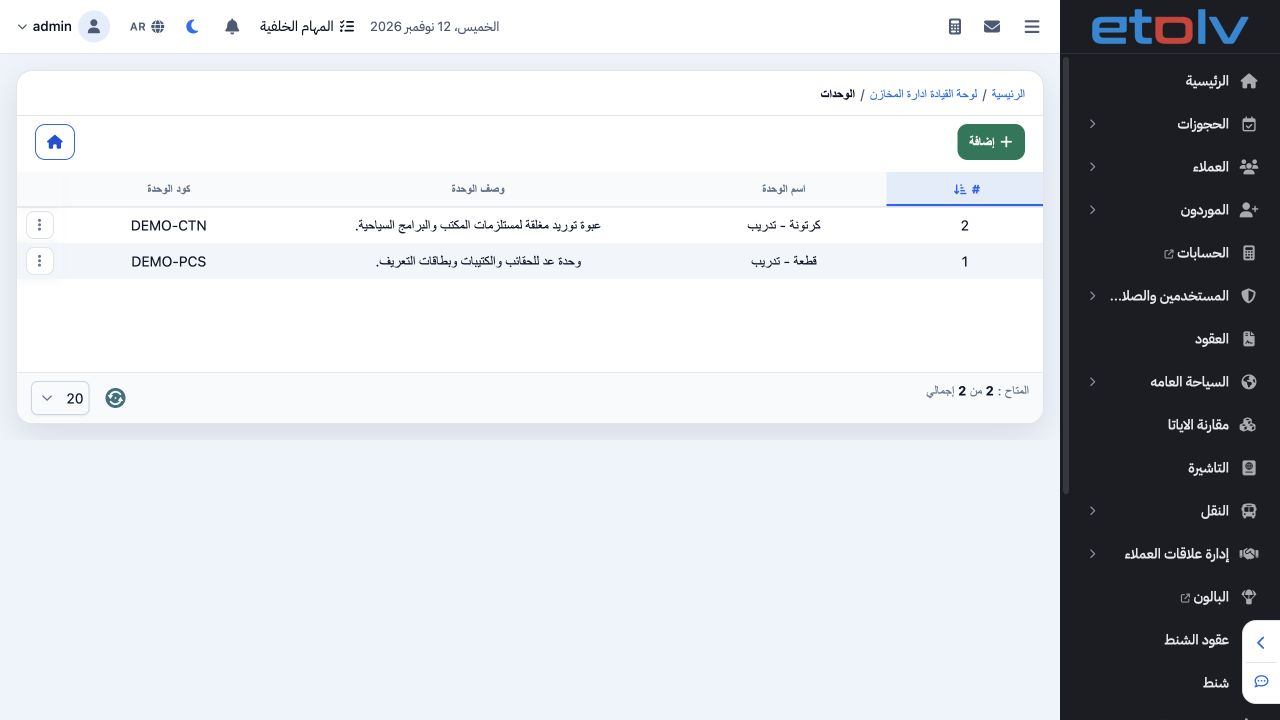
1 Open Unit Management from the Inventory dashboard. The list shows each unit’s number, name, description and code. The example contains Piece...
Open Unit Management from the Inventory dashboard. The list shows each unit’s number, name, description and code. The example contains Piece – Training and Carton – Training.

2 Add a unit

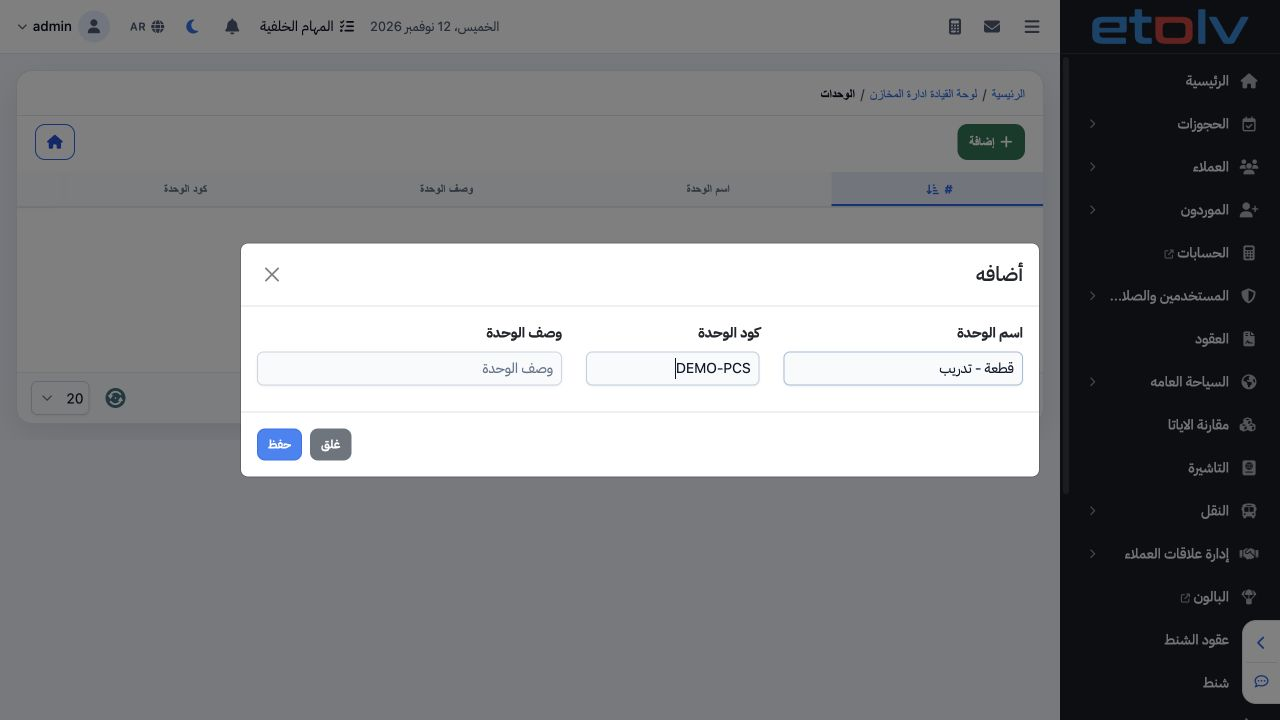
2 Choose Add, enter the name, code and description, then Save. The example uses DEMO-PCS for Piece and DEMO-CTN for Carton. Close dismisses an...
Choose Add, enter the name, code and description, then Save. The example uses DEMO-PCS for Piece and DEMO-CTN for Carton. Close dismisses an unsaved draft.

3 Edit a unit description

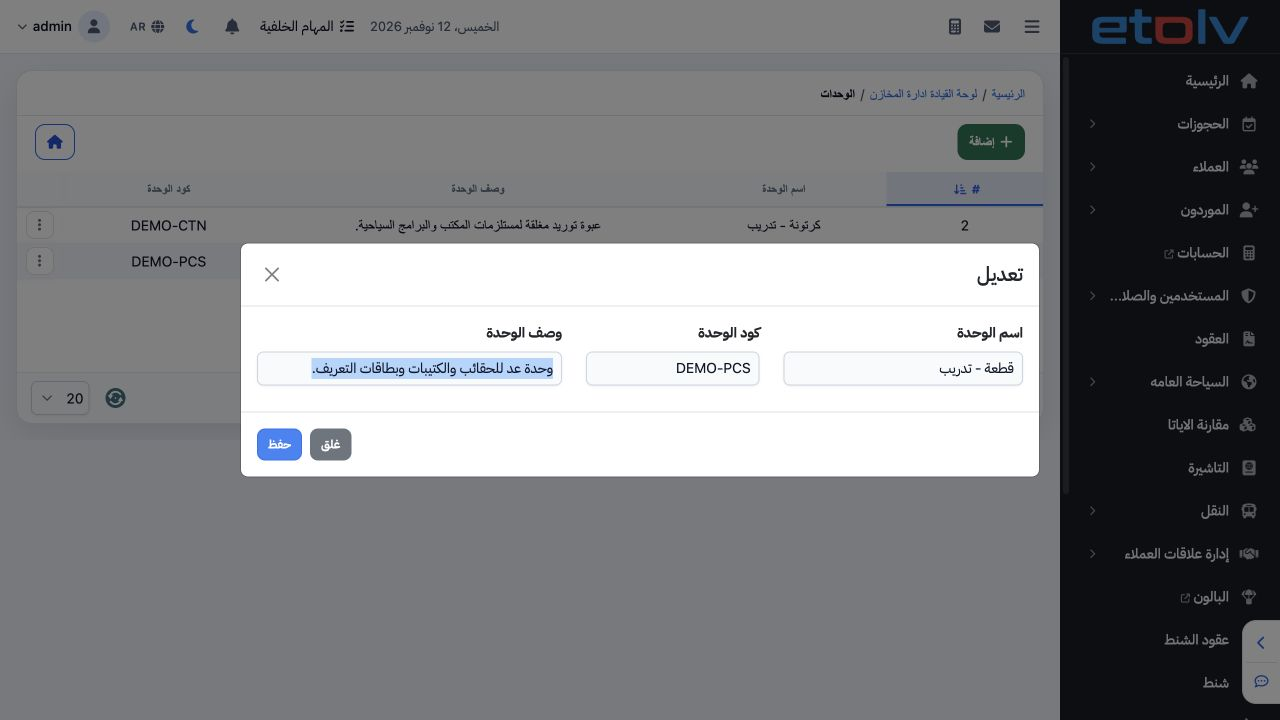
3 Open the unit row’s action menu and choose Edit. Review its name and code, change the description and save. The Piece description identifies...
Open the unit row’s action menu and choose Edit. Review its name and code, change the description and save. The Piece description identifies it as a counting unit for bags, booklets and identification cards.

4 Verify the saved change

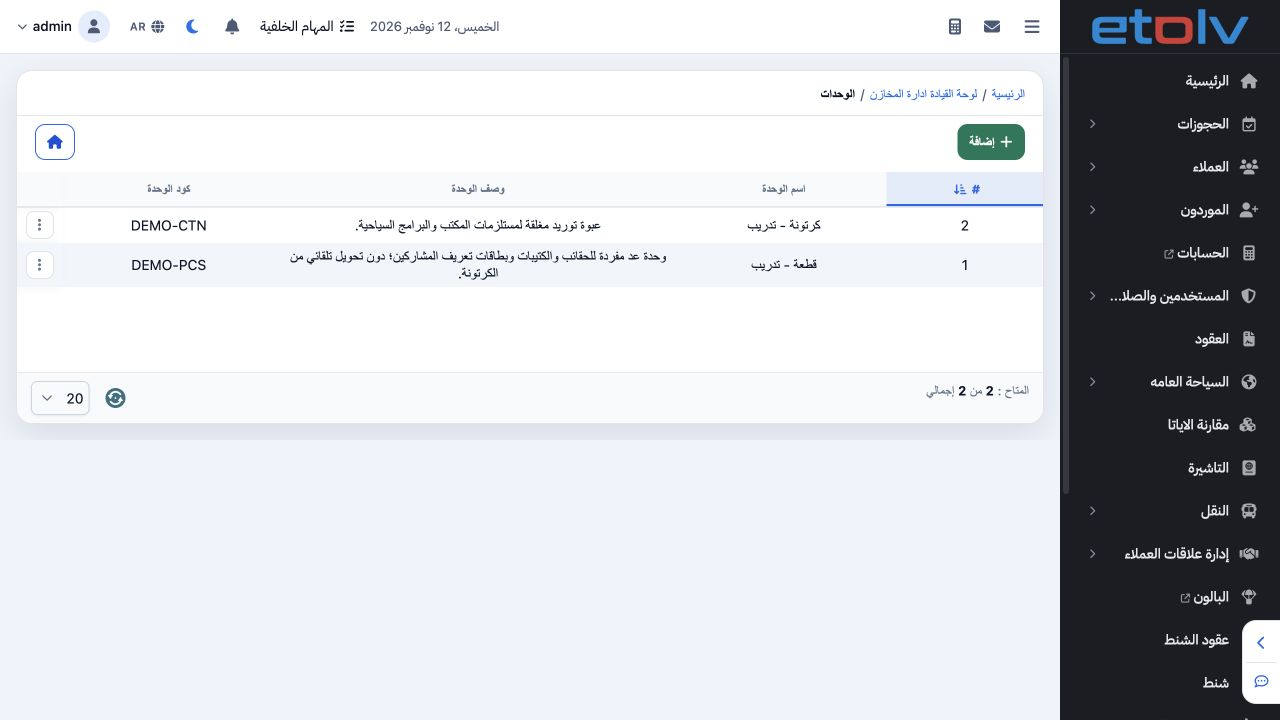
4 After saving, verify the updated description in the list. DEMO-PCS remains unchanged, the new description is visible and the list still cont...
After saving, verify the updated description in the list. DEMO-PCS remains unchanged, the new description is visible and the list still contains two units.

5 Review deletion confirmation

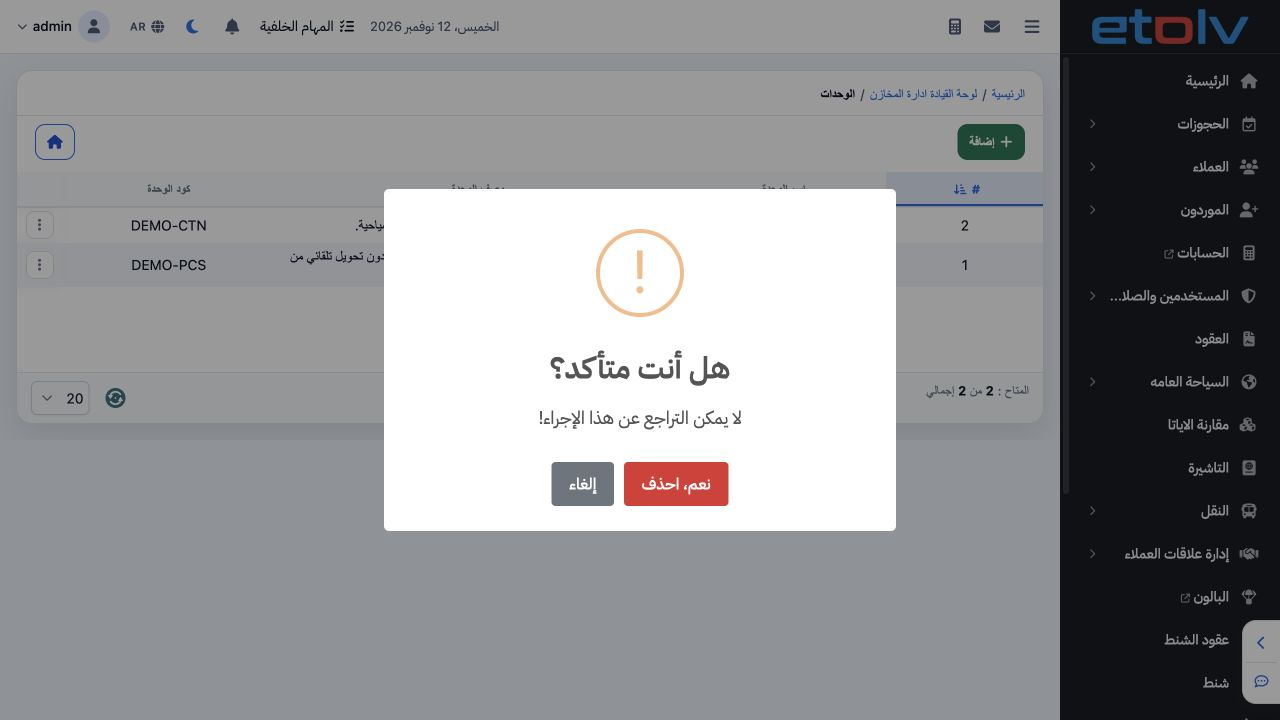
5 Choose Delete from the row menu to view confirmation. The message warns that deletion cannot be undone. Choose Cancel to retain the unit; th...
Choose Delete from the row menu to view confirmation. The message warns that deletion cannot be undone. Choose Cancel to retain the unit; this example did not delete the training unit.

Sign in to record the lessons you have read. Sign in